SHUTTER SPEED & APERATURE controls the amount of light let in and blur or lack of blur in your photo.
- For many photographers, the aperture is far more important to achieving great pictures than the shutter speed, because it controls the depth of field of the picture, whereas it's more difficult to tell if a picture was shot at 1/250 or 1/1000 of a second.
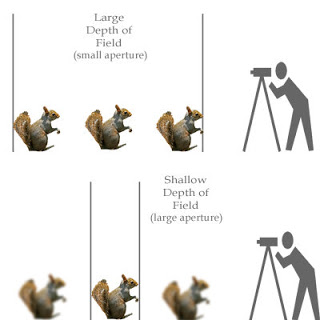
Set the aperture to control both the light and the amount that is in focus, in other words, the depth of field.
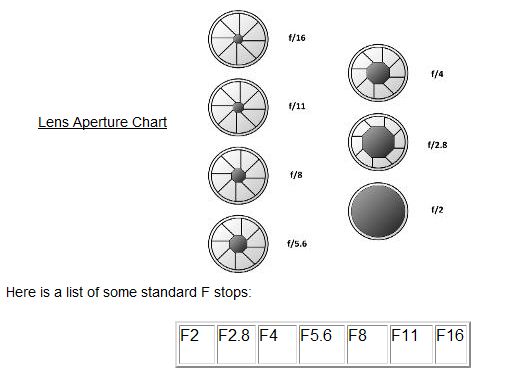
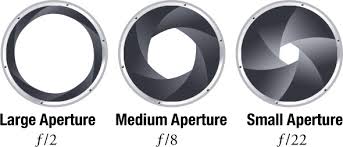
A very low number like f/2 is called a large aperture opening and gives a narrow (blurred) depth of field. An f-stop like f/16 is called a narrow aperture opening and gives a wide depth of field with little or no blur.
Want a blurred background? Use an aperture like f/2 for a narrow depth of field (dof). Portraits are especially nice using a narrow dof. The narrow dof in a portrait draws the viewers attention to the subject not the image background.
JIGSAW COLLABORATION
What is a Jigsaw?
We will be working in teams throughout this semester. Jigsaw collaborations require each member to learn one technique or strategy and then teach it to the rest of your team. You will be working with other members of this class who are not on your team to learn the technique. You will then go back to you table and share what you've done. In this way, a table of six will have the combined knowledge necessary to create six different photographs.
Why Jigsaw?
There is so much to know about photography and we have so little time. It is more efficient to work as a team and for each member to be an expert in a few things so that the group can succeed in many things.
Also, this is the way you will be working at college and in your careers!
HOW TO JIGSAW FOR THIS ASSIGNMENT.
1. Select a group leader to assign one of these photography assignments to each member. (Each of you will have the opportunity to be group leader this term.)
2. Join the table marked with your technique. As you work, the recorder will write down the steps you take using the graphic organizer below. Each member will take the organizer back to their table as a reference should a member of your team want to apply this technique to one of their photographs later.
3. Follow instructions for each technique. Work as a team. Once you have set up your motif, each member of the jigsaw team should take several photos.
Model Jigsaw
Let's set up a photo first as a class before you break into your groups. I need one volunteer from each table.
1. Camera/Tripod Operator: Selects shutter speed, aperture settings, composes shot
2. Director: Instructs Actors and Props. May instruct camera operator on type of shot.
3. Scout: Chooses the location/background of the photo
4. Props: Anything the actors use
5. Actor/Subject
6. Actor/Subject
1. Blurring and Panning using Slow Shutter Speed:

Take it slow . . .We use a slow shutter speed for two reasons: –First, because it's quite dark and we need to let more light into the camera. Or second, because we want to introduce some blur into our photo. We're about the latter for this technique.
1. Choose a slow shutter speed
2. Use a technique called "panning".
Panning is a photography technique where you follow your subject as it moves. Track your moving subject. When it is directly in front of you, press the shutter button. Importantly, as you press the shutter button, keep panning!
An example of a slow shutter speed is 1/15th of a second. You will get a blurred background, but the subject will remain sharply in focus.
This happens because relative to your camera the subject didn't move in the frame, but the background did. Hence the background appears blurred, and the subject stays in focus.
Blurring with Stationary Camera using Slow Shutter Speed:
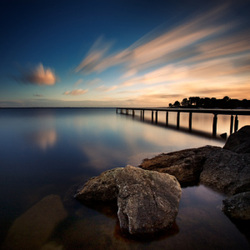
1. Choose a very slow shutter speed (ten seconds).
2. Find a subject that does not move and secondary subjects that do. Ex. A city skyline with moving cars.
2. Use a tripod or balance camera so that it doesn't move. Trip the shutter using the self timer. This will prevent the camera from moving even the slightest bit.
Stop Motion Using a Fast Shutter Speed
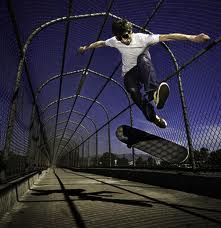
Photo by Isaac Bauman
Select a fast shutter speed.
A fast shutter speed could be considered anything from 1/500th of a second to 1/8,000th of a second. In this brief moment, time is frozen. As a photographer you can use this brief moment creatively to capture movement.
You will need good light, + a wide aperture + High ISO(1600)
A fast shutter speed could be considered anything from 1/500th of a second to 1/8,000th of a second. In this brief moment, time is frozen. As a photographer you can use this brief moment creatively to capture movement.
You will need good light, + a wide aperture + High ISO(1600)
Portrait with Blurry Background (Bokeh)
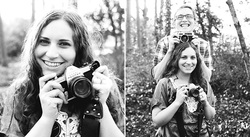
Set a wide opening, like f/2 or 2.8, to blur the background and have your subject razor sharp.
Still Life with Slightly Blurry Background

Shoot a medium aperture, 5.6 or 8 so the subject is sharp and background is slightly out of focus but still recognizable.
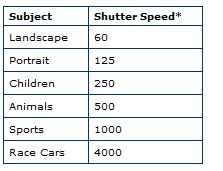
- Medium shutter speed: 125 or 250 for most pictures.
- Fast shutter speed: 500 or 1000 for action.
- Thirtieth or a fifteenth of a second to blur action or under low light.
Low Light- Higher ISO 1600
General tips for shutter speed:
- The closer action is to your digital camera, the faster the shutter speed is needed.
- To help prevent images from becoming blurred, set the shutter speed faster than the focal length. For example, a zoom lens set at 200mm requires a shutter speed of at least 1/200 second to avoid a blurred image. Adjust shutter speeds even faster for DSLRs with a focal length multiplier.
** Tripod or other camera support is recommended whenever using slow shutter speeds. Also use the self-timer or remote to trigger the shutter to prevent camera movement.
Learn your camera's "program mode". The exposure modes on your camera allows you to control how you adjust the picture. The basic mode is the “P” mode (program mode) and it allows you to manipulate both the shutter speed or aperture settings, and it will adjust the other value accordingly so that the picture is exposed perfectly according to thelight meter. The advantage of program mode is that you don't need to know anything. It's just a little bit above the green auto or “idiot proof” mode.
Get familiar with the "aperture priority" mode. On your digital camera you have the choice of “A-mode” or aperture priority. In the aperture priority mode (it's a way to determine the exposure); you the photographer picks the aperture or f-stop. The camera will choose the shutter speed for you. Aperture priority could be considered the more useful of the modes. So, you select the f-stop, whether it's f/2.8 to blur the background, f/8 for moderate depth of field, or f/16 to have everything in focus.
Investigate your camera's "shutter priority" mode. Have at least some familiarity with the shutter speed of your camera. The advantage of shutter speed is you set the number that's most convenient or most comfortable to use. Then the camera will pick the other number, the f-stop. On your camera, shutter priority can either be S or TV mode depending on your camera.
Foreground, Middle, background in Focus:
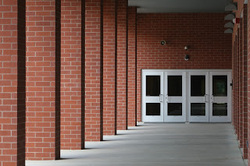
Shoot at smaller apertures, like f/11 and possibly smaller, for a landscape picture when you want the flowers in the foreground, the river, and the mountains all in focus. Depending on your format, tiny apertures like f/16 and smaller will cause you to lose sharpness due to diffraction effects.
Framing
